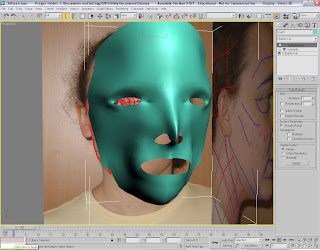
With the points down the middle of my face selected I slected the left view side and using the the Move tool move the points across the my face. The Plane and the Mesh of my face was not aligned properly so I Un-freezed the Plane by right click and selecting the option from the menu. I used the Select tool to select the Plane and moved the Palne into the rigth place, then I freezed the Plane again.
With the Mesh and Plane in the correct place I selected the Mesh of my face and went into Edit Poly and selected Vertex and I changed my viewpoint to the left hand side. I started to select each point and using the Move tool pu the points into the correct place to make the shape of my face, I also made the Mesh see through to make this task easier by going into Object Properties and selecting See Through from the list to make the shape of my face.
Once I had Pulled out the face I wanted make a duplicate so I added a Symmetry Modifier and selected the correct axes to make a duplicate of the face but facing the oposite way. I had to the move the new side of the face in line with other side of the face by going into Symmetry Mirror then using the move tool. I added a Turbo Smooth modifier to the face to make it look less edgie and bumpy.


No comments:
Post a Comment