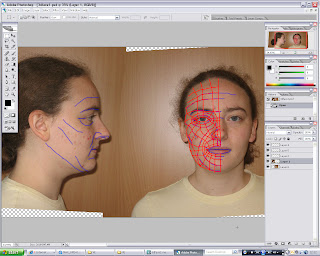
I finished putting the quads on one half of the front view of my face in Photoshop.

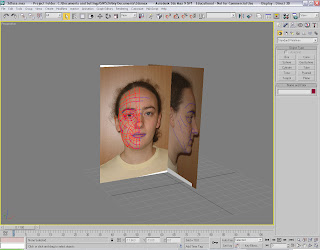
I then saved the Photoshop file then opened 3D Studio Maxs I first created a surface using Plane and changed the segments down to 1.
Once I had created the surface I used the Move tool to move the Plane into position. I then opened the Material Editor, then I selected a material and clicked on Diffuse, then from the list that come up I selected Bitmap, then I went through my files to find my psd file of the two view that I edited in Photoshop and selected to create the new material.
Once the material was created I clicked and dragged the material onto the Plane, I then added a modifier called UVW Map then from the options on the side I selected Bitmap Fit then selected the file I used to create the material. I then move the image on the Plane so it just shows the front view of my face.
I then created a a copy of the Plane then with the copy I edited the view to show the side of the face instead of the front view of the face. Then I the side view Plane so its to the side of the front view using the Move and Rotate tools to do this. I then freezed the two Plane objects so they won't move when I start to create my face.


No comments:
Post a Comment