Friday, 12 December 2008

Week 12 YMCA

All that needed to be done now was adding lighting to each scene and render each scene. I did the lights for each scene the same way what I did first go to lights and selected target light placed the light on the scene using the move tool to put it into place. Then went into the light menu and changed the colour of the light and selected show cone by clicking on the tick box, then I added an Atmosphere and Effect by clicking on the add button and selecting volume light from the list this made the lights look more like spotlights in the scene.

I then animated the lights by drawing a line using the line tool then I selected the light I wished for to move and selected from toolbar animation, then constraints, then path constraints then I selected the line I just created, with this done the light will move when scene played on the path that I had created. I did this to all the spotlights on all the scenes to make it more effective.

I added cameras so I could get different views of the scenes I also did path constraints like for the lights so the camera moved around the scene. Then any materials or colours that needed to be added were added to the objects.
With this all done the next thing is to render the scenes by clicking the render setup button on the toolbar and selecting the frames I wished to render then selecting the view I wished to render and selecting where I wanted to save the avi file, then just clicking render and waiting for the scene to render.

This was the longest part rendering the scenes as they took a long time due to what was in the scene and sometime part way through the rendering would crash. Also the other problems were if the camera was slightly off we would have to re-render that part of the scene. This is why we had move camera angles and short animations so that we could render in parts not all at once as it may have been too much for the computers to do.

Once the scenes were render we sat around a computer and put the scene in into premiere and edit and put the scenes together with music and added any effects needed. Once done we exported the movie.

I have learnt a lot in this module about saving in different stages and working in a group, also giving time for rendering and any problems that may occur.


Friday, 5 December 2008

Week11 YMCA


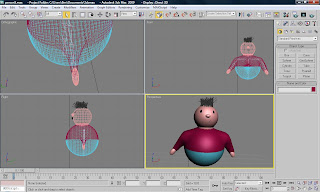
I started to animate the Punky Y I have never animated in 3D Studio Maxs so this is a new experience for me. I did the animation by first selecting the bone I wished to move and selecting auto key from the bottom of the screen, then I went to the time line on that above and selected the first frame and right clicking and selecting go to time. Once I had done that I moved the bone into position I wished for that frame then going to the bottom and clicking on the set key button. I did this for each movement by going to time on the frame moving the bone or part I wished to move using the move tool then set the frame. This took a long time to do as I had to set a frame for each movement and if it went wrong I had to go back and edit the frame.
The animation for Punky Y was simple it was just Punky Y head banging a few times on the stage.

I then went on to animate DJ C I did the same thing as I did for Punky Y by clicking on auto key then going to a frame and moving the DJ C using the move and rotate tool and then setting the frame. Again this took a long time to do but I didn’t want to do anything too complicated or it may or made it look wrong.

The animation for DJ C is it nodding its head and scratching the turn table and didn’t put the DJ C head right on top of the table as it didn’t look right it looked like he was hitting the table badly so I had to animate it slightly off table to make it look right.

For the crowd all I did was select a couple people and moved them up like they are jumping then back down then I did the same to another group of people in the crowd so the people were not all jumping at once. Then I just set frames like I did for Punky Y and DJ C the crowd scene didn’t need to be over complicated as the crowd are just extras not the main characters.

I found the animation a bit temperamental at times but once I had done it I was happy with what I had accomplished as I had never done anything like this before. We also decided on the music for each part of the animation.

Friday, 28 November 2008

Week 10 YMCA

James finished the design of the Reggae A and went onto to create the stage area.
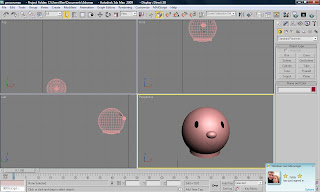
I created the eyes for the person using a small sphere using the sphere tool I moved the eye into place and used the mirror tool to create a copy of for the second eye. I created the mouth using the line tool to create the shape of mouth and used the move tool to place the mouth into place on the face.

I created the body of the person using a sphere tool to create a sphere that bigger than the head then adding a Editable Poly modifier to the sphere by right clicking on the sphere and selecting it from the list. I selected the Polygon from the Editable Poly menu and selected a couple of section on the side of the sphere and used the move tool to stretch the polygons out to the side, I also shift dragged when needed to copy the polygons to create arms for the person. This took some time to get the shape of the arms right I had to do the same process for the second arm as well.
Once I created the arms I created the hands using the sphere tool and using the move and transform tool to create the shape and move into place. I placed the head onto the body using the move tool, I made the head an editable poly and using polygon from the menu I selected the top of the head using the select tool and added a hair and fur modifier to the selected area. I did a simple style to the hair using the comb tool.


After talking with the group we decided not to give the person legs to give it a cartoon feel to the character and to it appeal to the younger audience. I did bone the person like I did for Punky Y, but we decided that we would just make the crowd jump up and down as it didn’t look right when I moved the person it went wrong.

After I finished creating the person for the crowd I went on to bone DJ C as James has only created the character in max not boned it. I used the same technique as I used for Punky Y, I found the DJ C a lot easier to bone than Punky Y as I had learnt from my mistakes from Punky Y.

I then merge the stage for Punky Y, DJ C, and the person, I did this by opening up the character file, and going file and selecting merge from the menu and going through the files and finding the stage that I got off James from the files. Once I had selected the file it would import the stage into the scene, once the stage was imported I placed the characters into place, so I placed Punky Y on the stage using the move tool, I did the same for DJ C, for the person I left on the floor in front of the stage. I also selected the person and shift click and dragged to make copies of the person to make the crowd all I did was change the top colours of the people.

Friday, 21 November 2008

Week 9 YMCA

I finished styling the hair for Punky Y but I couldn’t get too much of a style of the hair but I tried my best but a styling hair takes a long time, and it takes a long time to render in Maxs so I left it how it is.

James finished creating the DJ C and went on to designing Reggae A in Maxs. The next thing I did was bone Punky Y. To do this I went into System from the menu and selected bones from the menu, I have never boned a character that I have created in 3D so this a new experience for.
Once I selected bones I clicked and dragged to start creating the bones for Punky Y, I had to make sure all the bones linked together or when I go to move Punky Y once boned will not move properly. I did not find it easy to get the bones to link together or look right but once right I was okay with the bone tool after a while.

Once happy with the bones I moved the bones using the move tool into Punky Y, once the bones were in place I selected the Punky Y and selected a skin modify from the modifier menu, on the skin menu in Parameters I added the bones by clicking on the add button then selecting the bones. I test to make sure the bones were connected to the skin by selecting a bone then moving it.

I had to link the feature like the eyes, hair, collar, earring to the bones if not when Punky Y moves only the Y moved not the features. I linked them by selecting the object then clicking the link button from the toolbar and selecting a bone to link it to. This took a couple of attempts but once done nothing looked was left behind when Punk Y was moved.

Once I boned Punky Y I went on to create the crowd member I will only create one person then I will copy the person. As the characters are all cartoony I decided to create the crowd member cartoony, to start creating the person I used a sphere using the sphere tool to create the head and a smaller sphere for the nose I used the move tool to move the nose into place. I created the neck using the cylinder tool and moving it into place using the move tool.

Friday, 14 November 2008

Week 8 YMCA

I finished editing the vertex points of the Y in the editable poly to make the Y shape as smooth as possible. With this done I selected the Y and added a modifier to the Y the modifier I added to the Y was turbo smooth which help with what I attempted to do using the editable poly to make the Y less blocky and more cartoony.

The next thing I did was created a spiked collar for my punky Y character I did this by first using cylinder tool to create the round shape base for the collar then in modify menu I change the width, length and height of the cylinder to make it right proportion to fit on the punky Y’s neck.

I created the spikes for the collar using the cone tool to create one spike then in the modify menu I change the width, length to make the spike in proportion with the collar then using the move and rotate tool I placed the spike into place on the collar. I then shift click to copy the spike and using the rotate and move tool I placed the copy spike onto the collar I did this all the way round the collar.

Once I had finished placing all the spikes round the collar I grouped them together and moved the collar into position on the punky Y using the move tool.

I created the eyes using cylinder tool then transform tool to create the eye shape, I created the pupil the same way and placed the pupil onto of the eye using the move tool. Once I was happy with eye I move the eye onto the using the move and rotate tool. I selected the eye again and selected mirror from the toolbar to create a copy of the eye but facing the opposite way then using the move tool I placed the second eye into place.
I created the earring just by using the sphere tool and changing the height radius in modify menu for the sphere. Once happy with the shape I placed earring above one of the eyes using the move tool.

For the hair I created the box using the box tool and changing height, width, and length in the modify menu. I placed the box on the punky Y’s head using the move tool then I put a hair and fur modifier on the box. I have never used the hair modifier before and some computers don’t like hair modifier so this is a new experience. I found it difficult to change the hair style I found out how to change the colour of the hair in hair modify option changing the root and tip hairs different colour. I used the brush tool in the hair modifier menu to try and style the hair for Punky Y.


Friday, 7 November 2008

Week 7: YMCA

In our group that consist of me, Ben, and James we first of all created a story board for our YMCA project. We had decided that our advertisement was going to be about the Live band night, and we are going to make the letters from YMCA into characters.

In the storyboard it starts off with a view of the stage area and a crowd cheering and jumping around, then it goes to scene of the letter Y performing to its genre of music which we decided will be punk, we named the Y “Punky Y”. The next scene will be the letter M performing to its genre of music which we decided would metal, we named the M “Heavy Metal M”. The next scene goes onto the C letter performing as a DJ so its genre of music while be some form of dance club music, we named the C “DJ C”. The next scene is the A letter performing to Reggae genre of music, we named the A “Reggae A”. Once each of the letters performs the final scene is where all the letters that make up YMCA come together in the scene.

After creating the storyboard we separated the YMCA characters between us, it was decided that I would create the Y character which will be performing to the punk music. Ben will be doing the M character which will perform to the metal music. James will do the C that will do DJ genre music like dance. The A character will have the Reggae genre music and this character will be done by whoever finishes there assigned character.

Before I started creating the letter Y character I looked into the punk theme like looks clothing etc. Then I started to create Punky Y in 3D Studio Max.

To start the shape of the letter Y character I used box tool and created three boxes two the same size and one taller than the others then using the move and rotate tool I put the boxes into place to create the Y shape. Once I was happy with the placement of the coxes I used Boolean to join the three boxes together.

Once the boxes that created the Y shape were Boolean together I made the Y shape an editable poly by right clicking on it and selecting it from the list. With editable poly on the Y shape I went into editable poly and selected vertex to edit point of the Y using the move tool to try and make the Y shape smoother.


Friday, 31 October 2008

Week 6: 3D Face

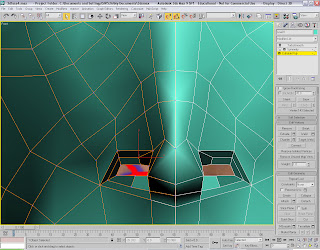
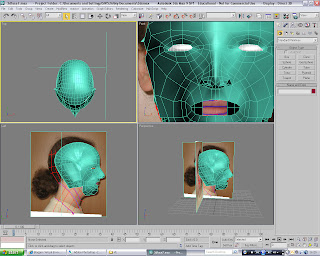
With the face being pulled out I went on to do more detail to the face like the nose first off I started by using the create in Vertex mode and Clone and transsform tool to make more line around the nose to give more shape and using the Split and cut to edit the splines so they flowed better with the rest of the face. I left a small gap for the nostril this took a long time to make the nose look correct.


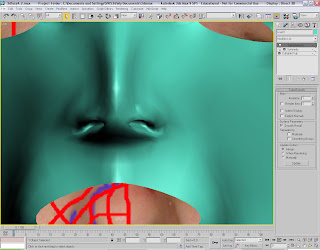
I created the nostrils by first creating two new splines then using Extrude and Move tool to move the splines up the nosre to create the nostril, I found this a bit tempromental as Maxs started to play up and freeze.


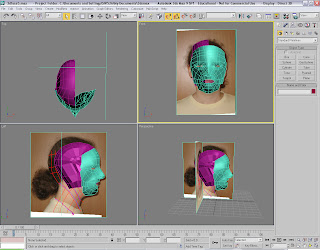
After I did the Nose I went on to do the head to create the head I first of all created a Sphere that was roughly the same size a my face Mesh. I then routated the Sphere so the splines of the Sphere matched up better with the face. I changed the amount of segemnts to the Sphere to match the face by going into the Sphere modify. Once I was happy with the Sphere I change the section region to a circle and selected the splines of the Sphere I wished not to have and deleted them leaving splined for the top part of my head.


I used the Snap toggle and vertex seltion on the Sphere and soft select to connet the top of the head with the face, I found this difficult to do with the line off being slightly out between the face mesh and sphere.


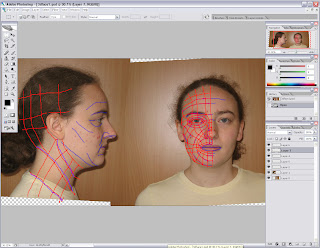
I eddited the left view of my face picture in Photoshop to add extra guide lines to help with the head and neck creation. This automatically changes on the Plane as its the same file.


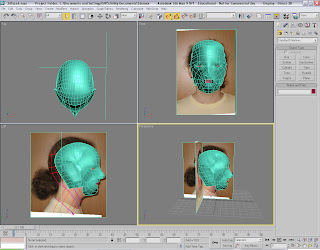
I started Cloning and Moving spline form the top of the head to the left side of the face to create the head and part of the neck. This took a long time to do as part would not clone or Maxs would crash and be tempermental. I used the snap toggle to make it connect to the face.


I then used the same technique that I used on the face to create the other side of the head and neck, aswell as adding a Turbo Smooth moodifier to the head and neck.


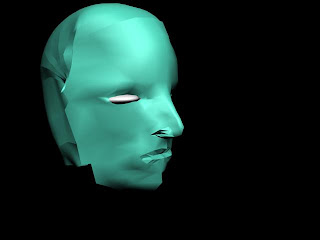
I created the eyes by creating a Sphere then using the transform and move tool Icreated the eye and placed it into position, I used clone to create a second eye.


I created the lips similar to the nose I created exra splines and used cut to make lips. Then using the Move Tool I moved the lips forward to make them more lip shape than flat and sunck in.


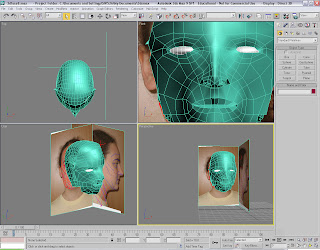
I then went look and editted to the best of my obilitie to make the head look like a head as possible. I ran out of time to add ears, hair and textures to my head, I did find creating the head hard in some places due I haven't done anything like this before, and I have also gained some experience doing this, that I will use in future projects.

I would definetly like to do something like this again as I have enjoyed it even with the times were I had to re-do parts as it wasn't right.


The I didn't enjoy was when Max went strange and I had to re-do parts of my face, but I have learnt to save in stages due to this.